Thursday, 31 May 2018

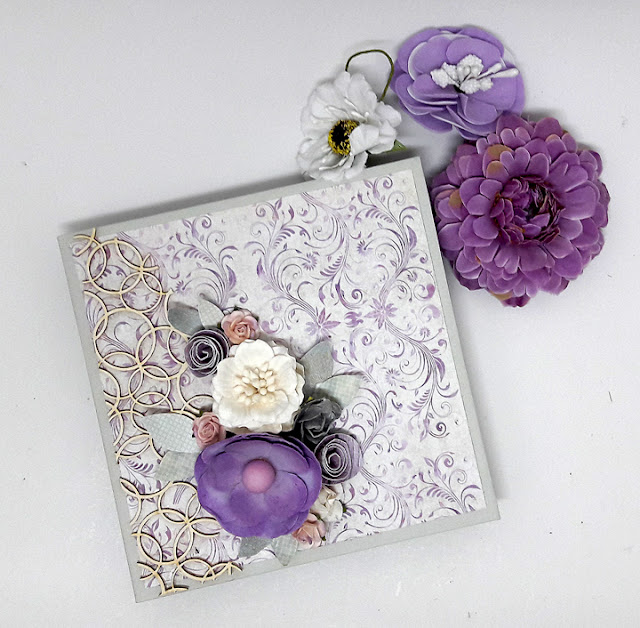
Interactive Mini Album with Einat

Hi dear crafty friends!

Einat here with a new project to inspire you.


Today I want to share with you a mini album I created. I used the accordion mini album from the store and covered it with papers.


However, instead of just covering the pages I added an interactive mechanism on each of the pages to make it more interesting and to add more room for photos.

Creating the mechanisms is easy! All you need is to add pockets or flaps by folding the paper in any direction you want.

Supplies used:


Have fun creating!

Tuesday, 29 May 2018

My First Foamiran Flowers and DIY VIDEO TUTORIAL with Tracey

Hello dear Scrap & Craft friends.

It's Tracey back to share a new video. I have created my very first Foamiran flowers and thought it would be fun to share the process with you in a DIY video including some tips I learned as I was creating them. I really enjoyed working with Foamiran and am delighted with the gorgeous and realistic roses I was able to make.


Here's a close up of the flower I created in the video:


Here are some close ups from the project I created with these flowers:

You can see how the rose from the video has more delicate and realistic edges than the large rose on my card. I share the tips I learned about working with Foamiran to achieve these edges in the video.


Scrap & Craft Product List
Foamiran peach, 30x35 cm
I used dies that I already owned, but if you need dies, the Scrap & Craft Store has a great selection of Flower Dies HERE.

A selection of stamen can be found HERE.

If you haven't tried Foamiran flowers yet, I hope you'll give them a try!!

~ Blessings ~
 Tracey
https://gracescraps.blogspot.com/

Sunday, 27 May 2018

"Together" 12x12 layout

Hello dear crafty friends! Lynne here with a layout using some of Studio 75's beautiful "The Peony Avenue" papers. I wanted a monochromatic look and loved the different grey patterns in this paper line.The brick pattern was perfect to cut around and make a shaped photo mat, and I made my own flowers with some of the paper as well.


The title piece looks gold in the photo, but was heat-embossed in Antique Silver to coordinate with the silver texture paste and metal quote strip in the lower right corner. I also added hand-stitching with embroidery floss.


Studio 75-The Peony Avenue-12x12 paper pack

Thanks so much for stopping by, and I wish you a wonderful and creative week! xo

Thursday, 24 May 2018

Envelope Card


Good Morning
Sandra here with my 
Latest DT Project with you 
Envelope card


Products from the Shop 

other products 
Black Cardstock 
Butterfly Embellishment 

Hugs 


Tuesday, 22 May 2018

Good Luck card with Studio 75

Hello everyone!

Emmy here today with a brand new card to share with you. For today's post I chose to design with the lovely Cherry Blossom colleciton from Studio75.


Products used to create this card:
Studio 75 - Blank cards 14x14 cm white
Creme Pearls
Pink Cherry Blossoms
Miszmasz - Daisy Frame Die Cut Chipboard
Double Sided Tape 12 mm
3D foam cubes

Take a 14 x 14 cm white card base. Cut a 13,5 x 13,5 cm and 13 x 13 cm panels from pattern papers from the Cherry Blossoms 6x6" Paper Pack. Distress their edges using a paper distresses and a paper piercing tool. Then sprinkle some glimmer mist on top and adhere them to the card base using foam mounting tape.


Die cut a paper doily from the pattern paper and adhere the sentiment on top using mounting foam tape. Attach the chipboard frame around it as shown.


To decorate the chipboard frame I used pink cherry blossoms and fussy cut leaves. 


As a final touch I added self adhesive pearls.


I hope I managed to inspire you today!

Have a wonderful creative week!


Sunday, 20 May 2018

Shadow Box Card...


Hello everyone! Simona's here to show you my latest project for Scrap & Craft DT.

For this card I have used one of my favourite collections by Craft O' Clock,  'Morning Dreams II'... pastel colours and wood patterns...I love it!
I thought that these double-sided papers were perfect to create a Shadow Box..then went the extra lenght and turned into a Shadow Box card.

Let's start with the box...
Use a sheet 12 x 12 inches, score at 1 – 1 ½ – 2 ½ – 3 inches, do this on all 4 sides. Then only on the top and the bottom sides score at 4 inches and 8 inches ONLY down to the 2nd score line...(see pic below for reference)


Then trace with a pencil the 'cutting' lines...please see pic below, do the same on the four corners and cut them out.


Crease the scored lines then attach double sided tape...start to shape the box glueing the longer sides first, and there you have it...your little Shadow box.


For the inside I have fussy cut some lovely flowers from the collection...to achieve a dimensional look I have used foam tape on the back, then added few die cut leaves. Glued some ribbon, half pearls and a sentiment stamped on leftovers .


For the card cut a piece of heavy cardstock to 6 ½ x 13 ½ inches and score at 7 inches then 7 ½ .
In order to keep it shut I decided to make a magnetic closure...for this cut a strip from the same cardstock 3 ½ x 1 ¼ inches, score at 1 ½ and 2 inches now glue a very thin magnet on the inside of the strip, pick up the second magnet and find the proper place to attach it to the front of the card, where it will be covered by the decoration.

I have decorated the front of the card quite simply, using a piece of the patterned paper cut to 6 ¼ x 6 ¼ . Used leftovers and white cardstock to cut labels for the sentiment, added some satin ribbon and half pearls...Finally it's time for secure the Shadow Box on the inside, with double-sided tape.


A special card for a special someone...

Supplies from SCRAP & CRAFT Store:

Thank you for stopping by...see you next time!

Kisses&Hugs!

Simo.

Saturday, 19 May 2018

Silk flowers

Hello everyone

It's Monika today with this big flower and smaller bud.
I used white silk foam and added deeper pink oil pastel to create this unique color. For the leaves I used olive green foamiran, cut few, heat each and press against leaf mould to create veins. To finish off my flower composition I took some of the pink oil pastel and gently brushed it over each leaf to highlight the texture.


If you are interested how I made it then check out my video tutorial from few months ago as above flowers were made the same way as on the video.


Mould -uniwersal leaf, BESTSELLER


Tuesday, 15 May 2018

Shabby Mixed Media Mother's Day Card with Tracey

Hello dear Scrap & Craft friends!

It's Tracey back to share a new project with you today. We are so blessed with a beautiful daughter-in-law who is an amazing mom to our little granddaughter, Avery. I created this sweet Mother's Day card for her featuring the Craft O'Clock Always Together Collection paired with Mulberry Magnolia Flowers and a Pink Cherry Blossom from the Scrap & Craft store.


Tips and Techniques
I simply adore how the Craft O'Clock collections include such gorgeous images on the back of the package label to use on your projects. I fussy cut a couple of these floral images to tuck in behind the dimensional flowers.

The focal flowers include Magnolia Flowers and Pink Cherry Blossom from the store. They are dry brushed with white gesso for a shabby mixed media feel.

I've also tucked in metal wings, resin flowers, ribbon leaves, die cuts, jewelry pieces, sequins, hand crocheted flower, art pebbles tin hearts, and art stones from my stash. When creating mixed media pieces, you can really combine about anything you might have laying around. I've colored the wings, resin flowers, jewelry piece, and art stones with color mist and art wax.

When creating a cluster, it helps to start with the larger pieces in the center, then build
out with smaller elements. Here, I built a layer of torn lace down from the center of the
cluster and added dimensional items over top.

Here's a close-up to see more of the mixed media background. I added stenciling, a bit of color, and white spatter with drawing ink. The edges are distressed to add to the shabby feel of the card.

Bambino Glue from the store is used to adhere the art stones and sequins.

Scrap & Craft Products
Thanks for stopping by today!

~ Blessings ~