Saturday, 30 June 2018

Wedding exploding box

Good morning everyone

It's Monika here with this wedding exploding box.
To make it I used 10cm exploding box base and The Peony Avenue paper collection, as you can see the are few chipboards and 3D wedding arbor in the centre of the box.
Because the wedding wishes ware very long I decided to created this scroll and tied a red ribbon around it.


Thursday, 28 June 2018

Steampunk Tags with Einat

Hi dear crafty friends!

Einat here with a new project to inspire you!


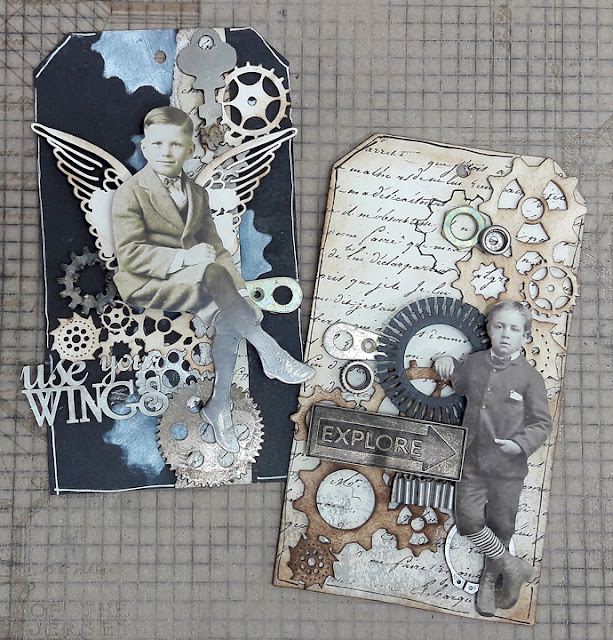
Today I'm sharing two steampunk tags I created. When you want to create a project with a steampunk theme it doesn't have to be with lots of fancy techniques. A few key ingredients and you can achieve the steampunk look in no time.


The three main things you need to add to your project are: brown colors, industrial embellishments like cogwheels and metal and a vintage or old looking photo or focal point.

Supplies used:


Have fun creating!


Sunday, 24 June 2018

Lavender Morning fairy layout by Lynne

Hello dear crafty friends! I just received a box of wonderful new papers and other goodies from Scrap & Craft this week and I'm thrilled to have these beautiful papers to create with! The photo is of one of the wire fairies sculpted by Fantasywire, and you can find out more about them HERE. I love the images and have used several on layouts.


I used a couple border punches randomly around the edges and tore the areas in between. Stenciling was done with homemade texture paste, and the circles were diecut. The fussy cut flowers are from the paper pack and were popped up with foam adhesive, and the Lemoncraft butterflies were a gift from a friend. That fabulous piece of lace is from my stash, and I believe it came from another friend who passed some craft supplies along to me when she moved overseas. the chipboard title is from Gypsy Soul Lasercuts.

I just love the vibrant, feminine colours of these gorgeous papers! Thanks so much for stopping by , and I wish you a vibrant and colourful week! xx

Studio75 Lavender Morning 12x12 paper pack

Thursday, 21 June 2018

"Life is Wonderful" Tag with Tracey featuring Studio75 The Peony Avenue

Hello dear Scrap & Craft friends!

 It's Tracey back to share a shabby mixed media tag featuring Studio75 The Peony Avenue Collection along with stamps, chipboard, flowers, and trim from the Scrap & Craft store. A product list can be found at the bottom of this post.

I've also included a handcrafted Foamiran rose.
A DIY video tutorial for this flower can be viewed HERE.


Tips and Techniques
 
 This beautiful focal rose is one of the first flowers I created with Foamiran. You can view my DIY video tutorial with tips on working with this fabulous product HERE.

 
 I tucked in a couple paper roses from the store. along with one trimmed from Studio75 Organza Rose Trim. I also fussy cut flower and leaf images from bonus sheets in the Studio75 The Peony Avenue Collection paper set. I adore mixing up textures and included real feathers along with one molded with paper clay and brushed with white gold art wax.

 
  The gorgeous Craft Molly Floral Corners Chipboard is heat embossed with shabby pink embossing powder. I've also added texture with pearls, Prills, microbeads, glitter shards, mini chipboard butterflies, and sequins.

 
 I stamped the background using stamps from the Scrap & Craft store.

The background was stenciled with transparent crackle medium, then brushed with green and rose color mist. I also added spatters with white ink then distressed the edges and colored with PanPastels.


I hope you've been inspired to grab your Scrap & Craft supplies
and create something beautiful today.

~ Blessings ~
Tracey
https://gracescraps.blogspot.com/

Tuesday, 19 June 2018

Best Wishes card with Cherry Blossom

Hello everyone!

Emmy here today sharing my second creation for June - a stylish Best Wishes card featuring the Cherry Blossom collection from Studio75.


Products used to create this card:
Blank cards 10x15 cm white
White Pearls
Double Sided Tape 12 mm
3D foam cubes

Take a 10 x 15 cm white card base. Pick two pattern papers from the 6x6" Paper Set and cut five 2 x 14,5 cm stripes. distress their edges using a paper distresser and adhere them to the card base.


Die cut a paper doily from black pattern paper and another doily from white cardstock, adhere them in the middle of the card and add the sentiment on top of them using mounting foam tape.


To decorate my card I used fussy cut pink cherry blossoms and white pearls. 


I hope I managed to inspire you today!

Have a wonderful creative week!


Sunday, 17 June 2018

Creativity takes Courage by Simona


Hello everyone and happy Sunday...Simona's here for another tutorial...You may not know it but I LOVE Tags...in every size they might be...if I could, I would only create my projects on Tags...they are versatile, you could use them as bookmarks, or make mini Albums out of them...or a Home decor, like today's project, as my Tag is about 26 cm x 15,5 cm – that is about 10 ¼” x 6” .

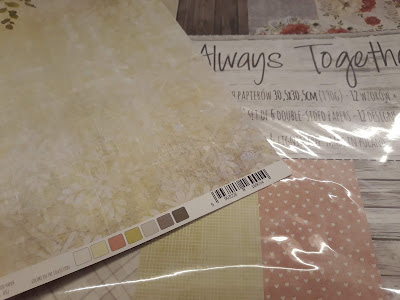
I have used the beautiful 12x12 paper set 'Always together' by Craft o'Clock...first I have primed my paper using Clear Gesso, then a wash of White Gesso...Cut the upper corners to get the look of a 'proper tag' and punched a hole in the middle.
I have used these little 'color proof' squares as a guide to choose my colours palette...


I have added watered inks with a brush, drying between each layer, than added splashes of colours and a lot of stamping to build my background. Also added touches of heavy white gesso through a stencil and darkened the edges with black ink. 


Using coloured pencils I enhanced the shadows on the flowers, then added touched of light with a white pen. Used die cuts, cheesecloth, black thread and straws made with book pages to build my composition, adding also some fussy cut flowers always from the same set.


Glued everything down, then added splashes of white and black ink,  green ribbon and a chipboard quote as final touches.

Here you can see more details...


Here's the supplies used, from the SCRAP & CRAFT Store:


As always I hope you enjoyed the project and thank you so much for stopping by...see you next time!

Kisses&Hugs!

Simo


Saturday, 16 June 2018

Guest book

Welcome everyone

It's Monika today with brand new inspiration for you all. 
This time I made this guest book 
from The Peony Avenue paper collection by Studio75 and placed chipboard frame under the names of the couple.
Of course I added some flowers, leaves and this beautiful chipboard doves with heart in the middle.


List of products:


Hope you like it and next time I going to show you an exploding box I made to go with this guest book :) so you can expect the same colour scheme.

Kisses 


Thursday, 14 June 2018

Foamiran Flower Card with Einat

Hi dear crafty friends!

Einat here with a new project and a tutorial!
Today I created a card with Foamiran flowers that I want to share with you.


Here's a short step by step tutorial on how to create the flowers:


Start with cutting a few flowers from the Foamiran. I cut two different sizes from the same die.


Then heat the Foamiran flower with your heat tool until it curls. You can crumple it with your hands to add even more texture to the petals.


Open the flowers and stack them together. Join them with a few stamen, a brad or even a large bead.


Supplies used:


Have fun creating!