Sunday, 29 July 2018

Artist Trading Coins with Simona...


Hello everyone and Happy Sunday! Simona's here with some new inspiration...
I love ATC - that is Artist Trading Cards - but recently I keep seeing these  'round' ATC, which are called Artist Trading COINS...the measurement is 2 1/2 inch, or 6,4 cm, of diameter...basically no difference but the shape...so...why not try and make a set of them!


The main struggle has been finding something I could use as a guide,since I have no dies or punches that fit...so I have used a jar lid that was just perfect. Traced in onto white cardstock, than onto scraps of the Cherry Blossom paper I had left  and glue them together...this project is perfect to use those bits and pieces of leftover paper!
The assemblage is very easy, lots of fussy cutting for the elements, used foam tape to raise some of them, add some black thread and that's it...


Hope you liked the results and will try and make some too...would love to see them!

These are the supplies used from SCRAP & CRAFT Store:

- Studio 75 'Cherry Blossom' 30x30 paper set
- Bambino Glue

Thank you for stopping by...see you next time!

Kisses&Hugs!
Simo.

Saturday, 28 July 2018

Card with chocolate

Hello everyone, it's Monika today with new inspiration for you.
This time I made a card with a pocked inside for a chocolate and used Cherry Blossom paper collection by Studio75 for it. This collection has extra die cut sheets which can be used for fussy cutting, I used few of the cherries to give even more dimensions and interest to my project. 


Of course I couldn't resist and had to add more flowers inside the card as well. 


Hope that you can see how this extra cherries gives nice lift to this project.


List of products: 


Sunday, 22 July 2018

Studio75 "Berry Cherry" birthday card ~ Lynne

Hello dear crafters! Lynne here with a step card featuring a combination of papers from two Studio75 collections, "The Berry Copse" and "Cherry Blossom". I found the neutral papers in the two packs coordinated beautifully together, and the soft green was a lovely complement as well.

I started with a 6" x 12" strip; after a few folds and cuts I ended up with this stand-up shape


I left the chipboard piece uncoloured as the natural shade matched the papers so well:


The Berry Copse paper pack, 12x12
Cherry Blossom paper pack, 12x12
Organza Rose trim , ecru
Scrapiniec Happy Birthday

So glad you stopped by, and I hope you enjoyed seeing my card!! Have a wonderful, colourful, creative week!

Thursday, 19 July 2018

DIY Mixed Media ATC's with Process VIDEO TUTORIAL ~ Tracey

Hello dear Scrap & Craft friends!

It's Tracey back with a set of mixed media Artist Trading Cards with a DIY Process Video Tutorial. These sweet ATC's feature the gorgeous Craft O'Clock Always Together Collection along with Scrapiniec Chipboard and flowers from the Scrap & Craft Store.


 In this DIY mixed media card process video and tutorial learn how to:
~ Use clear gesso to reduce warping
~ Add color with mist
~ Add texture with stenciled molding paste, and glitter
~ Add visual interest with spattered ink
~ Create texture with twine
~ Heat emboss chipboard  
~ Color sentiment strips with ink
~ Add texture with Prills, chunky glass glitter, and pearls using Bambino Glue

Enjoy!


Close-ups


Tuesday, 17 July 2018

Enjoy card with LemonCraft

Hello everyone!

Emmy here today sharing my latest card I created using the wonderful papers from LemonCraft and chipboard pieces.


Products used to create this card:
Scrapiniec - Brush art script - Dream
White cardstock, 30x30 cm
White Pearls
Anemone - Summer frame 02
Studio75 Designer Stencil - Marocco Clover
Texture paste
Double Sided Tape 12 mm
3D foam cubes

Take a 30 x 30 cm white cardstock and cut off a 21 x 15 cm stripe. Fold it in two to create the card base. Cut a 10 x 14 cm panel from pattern paper from the Yesterday paper pad. Distress its edges using a paper piercing tool and adhere it to the card base.

Then using a designer stencil with texture paste, create the dimensional white layer.

Cut two paper stripes from a different pattern papers and adhere them as shown. 


To decorate my card I chipboard frame and a chipboard word.


As a final touch I added self adhesive pearls.


I hope I managed to inspire you today!

Have a wonderful creative week!


Sunday, 15 July 2018

SUMMER DREAM layout with Simona


Hello everyone! I'm Simona  and today I want to show you my brand new project for Scrap&Craft...a breezy, summery LayOut...
I am very fond of this picture, taken last year on the beautiful and 'wild' Ag. Theologos beach in Kos...the mesmerizing sound of the waves and the amazing shades of the sea are still so vivid in my memories...
I have used a sheet of 12x12 paper from the 'Daydream' collection by Lemoncraft...these papers are absolutely gorgeous! The designs are so beautiful and perfect for my Summer mood!

Let's start...

I have covered the paper with Clear Gesso, then with a wash of white gesso added with a brayer.
Tried to add a composition of my elements, and when I have found the perfect placement I added colour using Inks, stamped here and there for more interest and then added modeling paste through a stencil...while it was still wet I sprinkled with embossing powder and heat set.
More stenciling with a white acrylic paint and dried it well.


Glued all the layers under the photo..I have used a lot of scrap papers, cardboard and pieces of vellum, when everything was in its place I added more colour with ink and a brush, dried and glued the 3d elements...Added also pieces of chipboard previously coated with white gesso.

Here's more details...


SUPPLIES FROM SCRAP & CRAFT STORE:


Hope you enjoyed this week's project...I wish you a great Sunday and....see you next time!

Kisses&Hugs!
Simo

Saturday, 14 July 2018

Lots of chocolates:)

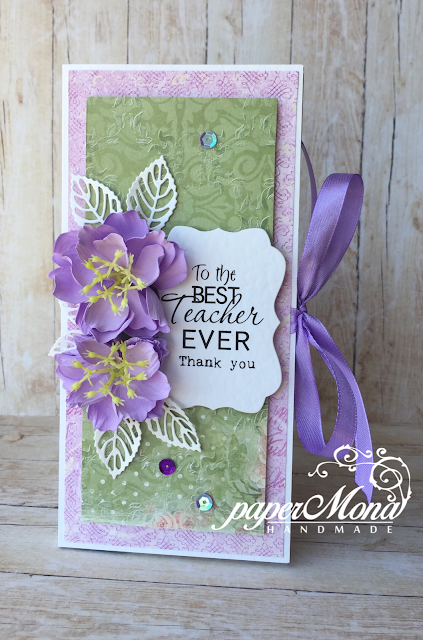
It's Monika today with lots of chocolate boxes I made recently as a thank you for teachers.
I used number of different paper pads and as you can see I made foamiran flowers for each box.
For the flowers I used regular foamiran in pink and purple but please check the full range of foamiran HERE.


List of products: 


Thursday, 12 July 2018

Combination Easel and Stair Step Card Tutorial with Einat

Hello dear crafty friends!

Einat here with a new project to inspire you!

Today I want to share with you a fun Combination Easel and Stair Step Card Tutorial.


Start with a 5 1/4" x 12" piece of double sided cardstock.  
Score the cardstock at 1 1/4", 2 1/2", 4 1/4", 6" and 9".

Fold the panel back and forth on the score lines so it looks like this.


Cut a 5 1/4" square panel out of the same cardstock and adhere to the front side of the back panel.


Cut three pieces of pattern paper to cover all front panels: 
5" x 5", 5" x 1 1/2" and 5" x 1".

Add embellishments and your card is finished!


Supplies used:


Have fun creating!


Sunday, 8 July 2018

Beautiful Marilyn- Craft o'clock "Celebrate Today" layout by Lynne

Hello there! I love the soft greens and greys in this lovely paper line and I knew it would look perfect with this photo of Marilyn Monroe that I've been wanting to use on a page for a while.  I love vintage movies and stars, and every so often I create a layout featuring one.


I stenciled with texture paste and misted here and there, and I couldn't resist making a few more foamiran flowers for added texture.


The leaf sprays were diecut then rubbed onto a green inkpad. The beautiful flowers in the paper pack are perfect for fussy cutting and layering. I randomly punched along the edge with a notebook punch for a little added interest, and added the looped pearl string, which I got at the dollar store.

I hope you enjoyed seeing my page; if you've ever done a celebrity layout, I'd love to see it on our Scrap & Craft Inspiration page!  Wishing you a wonderful and creative week!