Friday, 31 August 2018

"Fly" Mixed Media Card with Tracey

Hello dear Scrap & Craft friends!

It's Tracey back with a new project for you. The Craft O'Clock ~ Morning Dreams II paper collection has such gorgeous colors and fabulous images that can be fussy cut to embellish your projects. I've also used chipboard, stamps, organza trim from the Scrap and Craft Store.


Tips and Techniques
I selected delicate flowers to go with the soft colors on the gorgeous background paper and fussy cut flowers, then tucked in a single blossom from the Organza Rose Trim. I just adore this versatile trim that can be used in a strip or cut apart for individual flowers.

I treasure texture, so used Bambino Glue to adhere metal objects, Prills, diecut leafy flourishes, chunky glass glitter, microbeads, mica flakes, and rhinestones around the cluster and across the page.  Do you have a stash of found items like I do? It's so lovely to tuck in an odd found item or two into mixed media projects for a unique touch. I brushed them with metallic paint and art wax to fit in.

These fabulous Scrapiniec Steampunk Flying Hearts Chipboard Wings are heat embossed in pale gold, a perfect accent to the soft teal and pinks.

The background is stenciled with crackle paste, then spritzed with teal and white color mist. Once dry, white ink is spattered across for soft visual texture.

 
 I combined the Agateria Grill 3 Stamp with a flourish stamp from my stash to edge the top and bottom of the card. I thought this sentiment was just perfect to go with the chipboard wings in the cluster.


I hope you've been inspired to grab your Scrap & Craft supplies
and create something beautiful today.

~ Blessings ~
Tracey
https://gracescraps.blogspot.com/

Sunday, 26 August 2018

Yesterday Memories... Mixed Media LO by Simona


Hello everyone and happy Sunday! Simona's here with some new inspiration with this Mixed Media Layout...
I love everything Vintage, so I thought that Sheet n.03 from the Studio75 Cherry Blossom 12x12 paper set would have been the perfect base for my project...I decided not to use too many colours in order to keep it simple and give the right importance to the cluster.

I applied Clear gesso on the paper, then started to stamp on the edges and add modeling paste for more texture and interest...as already said, kept my palette pretty simple, using only 2 colours: a vintage brown and a black, then splattering with white and black inks.


For my focal point I have ripped few strips  from the Cherry Blossom 6x6 paper pad, distressing the edges, then stamped few clocks images, fussy cut them, distressed and added to the cluster.
I have also used a beautiful Clock chipboard by The Mini Art, embossed it, cut it in 2 and glued it to the paper.
Then some thread, stickers and paper dolls to finish it off.
For a more vintage look I have added also some lace and this lovely organza rose trim.


These are the supplies from SCRAP & CRAFT Store:

- Studio75 Cherry Blossom 12x12 paper set
- Studio75 Cherry Blossom 6x6 paper set
- Studio75 Designer stencil - Marocco Clover 
- The Mini Art Clock with cogs chipboard
- Agateria Grille n.3 stamp
- Organza rose trim - ecru
- Bambino Glue gr.45 tube

Thank you for stopping by, hope you liked today's project! See you next time...

Kisses&Hugs!
Simo.


Saturday, 25 August 2018

Wedding exploding box

Welcome everyone

Today I'm sharing this wedding exploding box 
with 3D wedding arbor. 
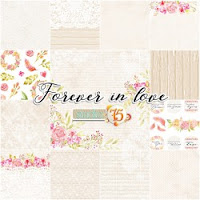
To make it I used 10 by 10 box base and Forever In Love paper collection by Studio75 to decorate every side of the box. 
In the middle I placed the 3D wedding arbor which has been decorated with pink roses and white magnolia flowers.


Sunday, 19 August 2018

Pure Elegance-layout with Studio75 "The Berry Copse"

Hello there, dear crafty friends! It's Lynne here with a layout I created using the lovely "The Berry Copse" papers and a photo of  one of the beautiful statues my son has visited during his past few years living and going to school in China. I thought the colours set the photo off so well, and I added some paper flowers from the Scrap & Craft store and cut up one of the metal flowers to create leaves.


I flattened the flowers a bit and inked them with moss green ink to coordinate with the papers and the fussy-cut greenery. There were so many lovely floral bits to cut out and they added just enough extra dimension to my page. I used Martha Stewart border punches for my edges. I hope you like my page and I wish you a wonderful week!

The Berry Copse 12x12 paper set
https://scrapandcraft.eu/the-berry-copse/1923-the-berry-copse-12x12-paper-set.html?search_query=the+berry+copse&results=4

Mulberry Paper Magnolia Flowers
https://scrapandcraft.eu/search?controller=search&orderby=position&orderway=desc&search_query=paper+flowers&submit_search=

Metal Flowers, Old Silver
https://scrapandcraft.eu/search?controller=search&orderby=position&orderway=desc&search_query=metal+flowers&submit_search=


Thursday, 16 August 2018

"Shine Brightly" shabby mixed media card with Tracey

Hello dear Scrap & Craft friends!

It's Tracey back with a shabby mixed media card for your inspiration. I just adore playing with color, and this gorgeous teal green paper from the Studio75 Berry Copse 6x6" Paper Collection is a perfect backdrop for magenta and gold accents featuring chipboard and flowers from the Scrap & Craft Store.

 Tips and Techniques
I arranged the floral cluster around this gorgeous Craft Molly Zahia chipboard frame. I wanted a few white accents to add lightness to the card, so simply heat embossed the frame in white. I've used a couple flowers from the store including the delicate ivory rose tucked below the sentiment.

I colored a white Apple Blossom with color mist and paint to coordinate. Bambino Glue was brushed around the cluster to adhere art stones and seed beads for texture.

Additional texture was created by mixing gold mica powder into gel medium to stencil onto the background. While wet, I sprinkled with gold microbeads. Since gel medium can work as an adhesive the beads are well adhered to the card.

The Scrapiniec Confetti Hearts are so versatile! I added three layers of color before scattering them around the cluster. I started with a layer of teal embossing powder, followed by teal glitter embossing powder, then one edge is brushed with gold art wax. 

I also added pearls, rhinestones, and mica flakes from my stash adhered with Bambino Glue.

I backed the card front with a fabulous Studio75 15x15cm Blank Card. These white cards are super heavy and hold up the weight of all my embellishments perfectly.

The background is stamped randomly with a script stamp and edged with a leafy scrolled design, then spattered with white drawing ink. I've also tucked in leafy white die cuts and a couple metal pieces rubbed with amethyst art wax.

I hope you've been inspired to grab your Scrap & Craft supplies
and create something beautiful today.

~ Blessings ~

Sunday, 12 August 2018

Use your Wings...a Steampunk tag with Simona...


Hello everyone and welcome back for another Sunday together...I'm Simona and want to show you my new project ...a 'very' Steampunk Tag!


I love Steampunk and grungy...adding metallic accents, both real metal or just metallic paints and waxes, makes me happy...
I got this new embossing folder and wanted to try it out, so after embossing a piece of spare cardboard, I glued it to a Chipboard TAG with the Bambino Glue and cut off the excess.
To achieve a metallic, grungy look I have used inks, metallic crayons and waxes, then set aside...

Then used these beautiful Steampunk SMALL CHAINED WINGS chipboards by Scrapiniec, painted with black gesso and highlighted with metallic waxes...I painted with white gesso the chipboard Inscription 'USE YOUR WINGS' by Artistiko , then embossed with a 'Rust' effect embossing powder, and darkened all the edges. Then assembled all the pieces...to secure the wire I have used a Silver Vintage Brad...Here's few details...


List of supplies used from SCRAP& CRAFT Store:


Thank you for stopping by...hope you got some inspiration...see you next time!

Kisses&Hugs!
Simo

Saturday, 11 August 2018

Birthday wishes

Hello everyone
It's Monika today with this cute first birthday card. 
I used The Mini Art papers in mint for the background and then punched two borders and glued the pink panel in the middle to create dimension.
Unicorn digi stamp has been placed in the middle of a doily and then I just added a flower composition an a little cloud with number one to accent that it's a 1st birthday.


List of products: 


Sunday, 5 August 2018

Dimensional birthday card with "Daydream"~Lynne

Hi There! I fell in love with the colours and patterns in Lemoncraft's "Daydream" paper set as soon as I saw it and knew I wanted to use it for something special. There is nothing more special than my very best friend, so I used it to create a birthday card for her.


I wanted to use paper birthday sentiments rather than chipboard as I was afraid the weight would affect how well the card stood, and I was thrilled to see how beautifully the cut-aparts in the Kaisercraft "Wildflower" collection coordinated with the papers I used on my card; I think they look like they were made for each other (just like my bestie and me!)

I started with a 5-1/2 x 12" piece of white cardstock for the card base, folded and cut according to a pattern I found online, and added patterned paper after inking the edges in teal. I found that the wreath cutout in the upper right corner was a little floppy so I added a piece of clear plastic from some packaging behind it  to hold it in place. A few of the pretty, delicate Cherry Blossom foam flowers complete the look and added a bit of texture....and even with the flowers, my card folded flat enough to fit into an envelope!


These paper sets are a perfect size; I still have plenty left to create a layout! YAY!

Thanks so much for stopping by and I wish you a wonderful, colourful, creative week! xx
Lynne

Thursday, 2 August 2018

Industrial Masculine Tag Featuring Studio75 Cherry Blossom Collection with Tracey

Hello dear Scrap & Craft friends!

It's Tracey here to share a new project to inspire you. I enjoy getting grungy with masculine designs. This tag is a graduation gift for the son of a good friend. I just adore this senior portrait taken of him on a bridge with the industrial red beams. The tag board is rather large at 6 1/2" wide by 12" high so is a great home decor piece featuring the Studio75 Cherry Blossom Collection as well as chipboard, stamps, and brick stencil from the Scrap & Craft Store. A complete product list can be found below.


Tips and Techniques
I wanted to bring in a grungy industrial feel to go with the gorgeous bridge in the photo so the gears in the Scrapiniec Flying Hearts Set were just perfect. This is one long strip of gears that I cut to frame the corner of the photo. The chipboard was heat embossed with aged taupe enamel for an old metal feel. 

Around the tag edges, I stamped with the Grille and Grille 3 stamp with grey ink.

The Small Brick Stencil with molding paste is a perfect accent on the background. It's spritzed with silver/black and crimson color spray to highlight the texture. These colors were also used to add spatter texture. The dark paper behind the photo came from the 6x6" Studio75 Cherry Blossom Paper Set and was torn to size then inked to tone down the bright white edges.

The circle piece was diecut from chipboard and enameled with the aged taupe powder. I found a roll of back plastic mesh at a flea market that's great for masculine pieces. I cut and brushed a couple bits with art wax to tuck under the photo.

The small stars are from the Scrapiniec Confetti Stars Set. There are just a ton of little stars in this set that can be used so many different ways to go with any project. Here I brushed them with rust paste so they look like rusty metal.

I have a bag of rusty washers collected by my friend's husband who knows I adore rust. I just had to use them for their son's gift. At the bottom of the bag I noticed flakes and bits of rusty goodness. I brushed Bambino Glue around the washers and sprinkled the rusty bits into the glue for texture. The washer is topped with a barn star and gear. To make it look like the washer had rusted in place, I brushed some rust paste around the washer and spritzed with water.

More rusty goodness. A piece of chunky silver chain was brushed with more rust paste to color.

The tag background is from the 12x12" Studio75 Cherry Blossom Paper Set. I traced and cut the paper then used soft matte get to adhere the paper to the tag. Rolling with a brayer made sure the paper was adhered securely. Once the gel was completely dry, the edges were lightly sanded then inked.

This cool gear came from the Artistiko Cogs Set made from HDF board. I just adore the fabulous gear shapes in this set. It was heat embossed with metallic bronze powder with just a hint of black mixed in.


I hope you've been inspired to grab your Scrap & Craft supplies
and create something beautiful today.

~ Blessings ~
Tracey
https://gracescraps.blogspot.com/